Modals#
Modals allow bots to prompt a user for more information as the initial response for a slash command, context menu or message component interaction.
This guide is only going to cover using Yuyo's Modal client to make and handle modals as, while you can use modals with just Hikari, higher level clients make it a lot easier and are the recommended approach.
Making modals#
class Modal(modals.Modal):
    async def callback(
        self,
        ctx: modals.ModalContext,
        name: str = modals.text_input(
            "name", placeholder="What is their name?", max_length=20
        ),
        reason: str = modals.text_input(
            "reason",
            default="Still likes harry potter.",
            style=hikari.TextInputStyle.PARAGRAPH,
        ),
    ) -> None:
        await ctx.respond(f"{name} is sussy because they {reason}")
Modals take the shape of dialogue boxes which show up on top of everything else for the user who triggered the relevant interaction. The above example shows up in the client like this:
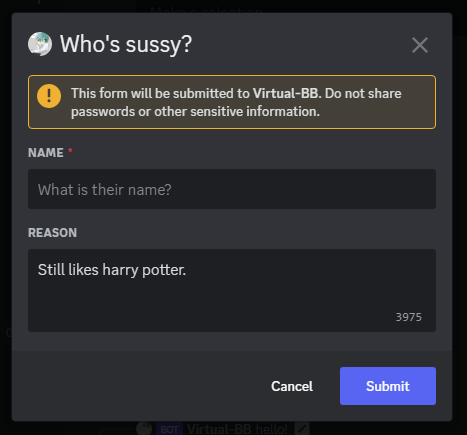
The only supported field type for modals is "text inputs" right now. Text inputs (as the name suggests) let the user input text to send to the bot and a modal can have up to 5 text inputs in it, each taking up to 4000 characters. The bot will not be told if a modal pop up was cancelled or closed without submission.
Rows#
Modals also have the concept of "rows" in a similar sense to message components and Modal also handles creating new rows for you. Right now text inputs always take up a whole row.
Sending a modal#
async def command(
    ctx: tanjun.abc.AppCommandContext, client: alluka.Injected[modals.Client]
) -> None:
    modal = Modal()
    custom_id = str(ctx.interaction.id)
    client.register_modal(custom_id, modal)
    await ctx.create_modal_response(
        "Who's sussy?", custom_id, components=modal.rows
    )
As shown above, creating a modal in response to a slash command, context menu, or message component use is simple. First you register the modal instance to a top-level custom ID by calling ModalClient.register_modal (which defaults to 1 use and a 2 minute timeout). Then you can pass Modal.rows to create_modal_response as components alongside the top-level custom ID and the model's title. A modal can only be triggered as the first response (before deferring).
This example uses the interaction's ID as the modal's custom ID since these meet the requirement of having to be unique per registered modal.
Row! Row! Fight the power!#
This guide only covers one of Yuyo's approaches for declaring modals and only gives a basic overview. For more information on Yuyo's modals functionality see its usage guide.